


Manajemen User and Service
A. Tujuan
A. Purpose
B. Konsep Dasar
- Untuk mengetahui cara mengganti identitas di mikrotik routerboard
- To know how to change the identity in mikrotik routerboard
- Untuk mengetahui cara manajemen User
- To know how to management User
- Untuk mengetahui cara manajemen Service di mikrotik routerboard
- To know how to management Service in mikrotik routerboard
B. Konsep Dasar
B. Basic Concepts
Manajemen user adalah melakukan perawatan , pengecekan, penambahan, pengurangan dan lain-lain, untuk suatu tujuan tertentu yang dilakukan oleh seorang administrator untuk melayani user atau clientnya
D. Konfigurasi
User management is doing maintenance, checking, addition, subtraction, etc., for a specific purpose that is done by a user or administrator to serve its clients
D. Configuration
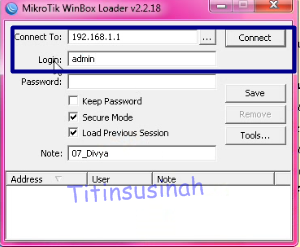
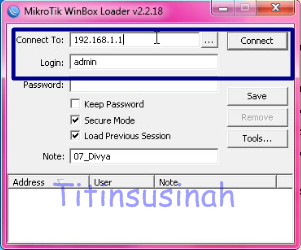
1. Langkah pertama buka aplikasi winboxtnya dan hubungkan dengan mikrotik routerboard.

2. Setelah itu akan mengganti nama identitas mikrotik routerboard, dengan pergi ke “system” lalu “Identify”
1. Langkah pertama buka aplikasi winboxtnya dan hubungkan dengan mikrotik routerboard.
1. The first step to open the application winboxt and connect with mikrotik routerboard
2. Setelah itu akan mengganti nama identitas mikrotik routerboard, dengan pergi ke “system” lalu “Identify”
2. After that will rename routerboard mikrotik identity, by going to the "system" and "Identify"

3. Setelah itu akan muncul tampilan seperti berikut , isikan “Identify” sesuai dengan nama yang anda inginkan , lalu “Apply” dan “OK”
3. After that will appear as follows, fill in the "Identify" to the name that you want, and then "Apply" and "OK"

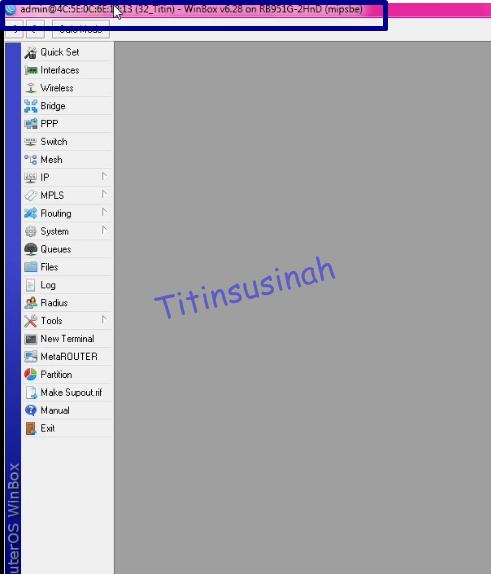
4. Jika sudah selesai maka hubungkan kembali mikrotik pada winboxt, jika berhasil akan terlihat pada bagian paling atas nama yang telah diubah
4. If you are finished then reconnect mikrotik on winboxt, if successful will be visible on the top of the names have been changed
Manajemen User
5. Disini akan membuat user baru dalam kelompok grup full. Pilih “system” lalu “Users”
5. Here will create a new user group full group. Select "System" then "Users"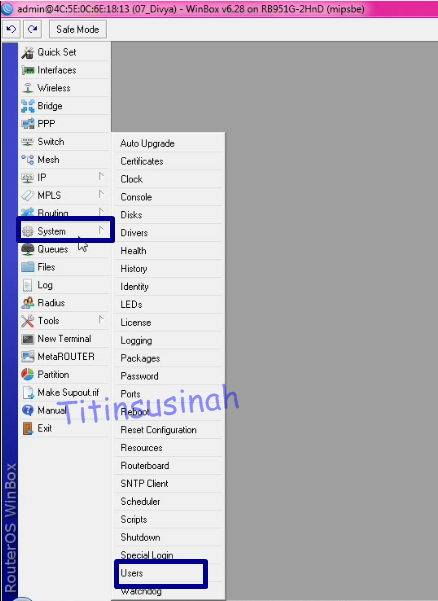
6. Pilih tanda “+” untuk menambahkan user. disini menggunakan Group “Full” maksud dari full adalah user baru memegang seluruh hak atas router . Dan klik “Apply” lalu “OK”
6. Select the "+" to add a user. here using Group "Full" the intent of the new user full holds the rights to the router. And click "Apply" then "OK"

8. Dan selanjutnya buat user admin dengan menambahkan Ip, setelah itu “Apply” dan “OK”
8. And then create an admin user to add Ip, after the "Apply" and "OK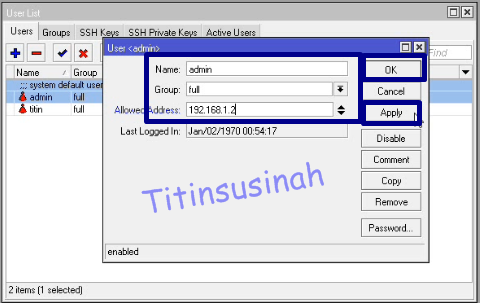
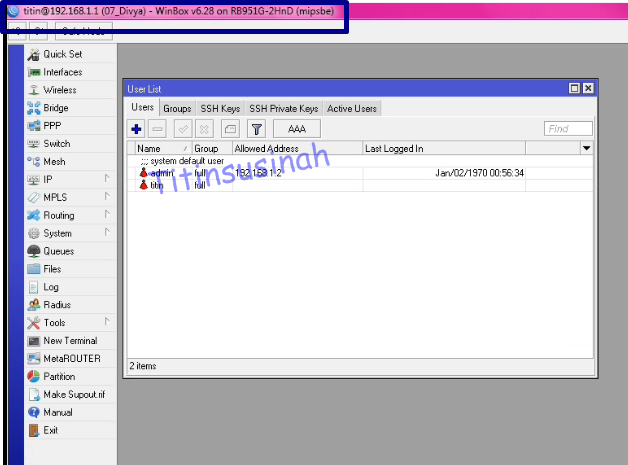
9. Dan jika sudah akan terlihat user yang telah dibuat
9. And if it is going to be visible to users who have been made

Dan coba login dengan user yang telah dibuat sebelumnya yaitu contoh “Titin”
And try to login with the user that was created earlier is an example of "Titin"

10. Dan terlihat pada bagian atas dan nama paling depan telah terganti menjadi user yang baru dibuat
10. And look at the top and the name of the front has been replaced into the newly created user
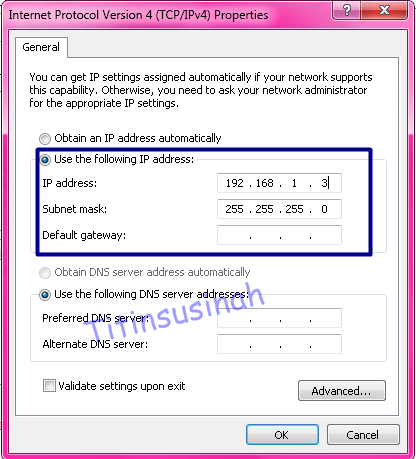
11. Lalu pada client ubah ip selain dari ip router dan admin
11. Then the client to change ip ip router and apart from admin
12. Kemudian login menggunakan user yang buat dengan menggunakan IP
12. Then login using the user that created by using IP
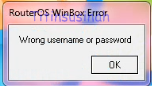
13. Lalu tidak akan bisa login dna hanya muncul peringatan terjadi kesalahan username atau password, hal ini karena IP admin untuk client yang telah diatur beda dengan IP client
13. Then will not be able to login dna warning appears only username or password error occurs, it is because the IP admin to client who has arranged different IP client
Manajement Service
14. Selanjutnya kita login dengan user yang berhasil
14. Next we login with the user successfully
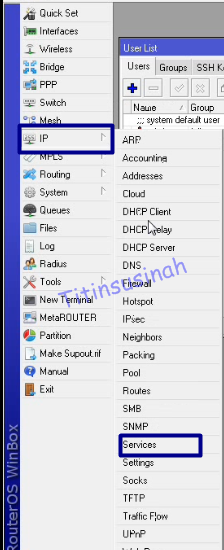
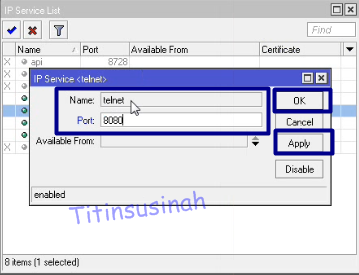
15. Dan pergi ke “IP” lalu “Service” karena disini akan mengubah port pada telnet menjadi 8080 dan login melalui telnet
15. And go to the "IP" and "Service" because here will change the telnet port on into 8080 and login through telnet
16. Kemudian double klik pada bagian telnet dan ubah port , dan “Apply” lalu “OK”
16. Then double-click on the telnet and change the port, and "Apply" and "OK"
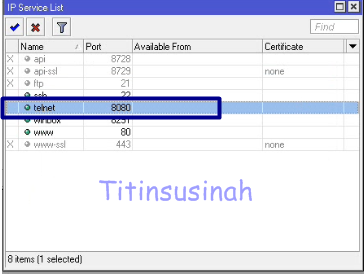
17. Dan ini tampilan jika port telnet telah berhasil dirubah
17. And this is the view if the telnet port has successfully revamped
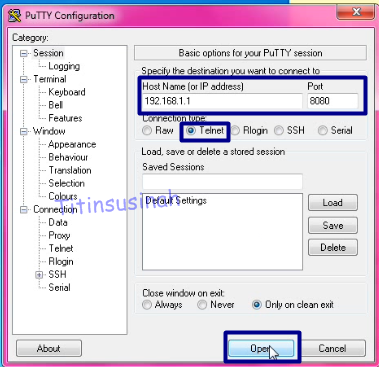
18. Untuk melakukan pengujian telnet dengan port yang telah diubah , gunakan putty untuk meremot nya. Isikan IP address router, pada bagian port isi kan port yang telah diubah, dan jenis koneksi “Telnet” lalu “open”
18. To perform the test with the telnet port has been changed, use putty to its Meremoth. Fill in the IP address of the router, on the part of the contents of the port the port has been changed, and the connection type "Telnet" and "open"
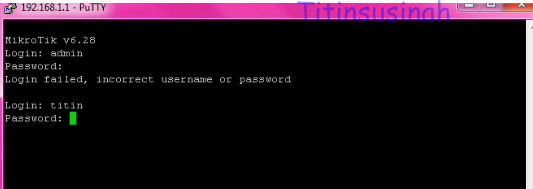
19. Lalu akan diminta user dan password
19. Then the user will be asked and password
20. Lalu hubungkan kembali router dengan winboxt dan beralih ke “IP” lalu “Service”
20. Then reconnect with winboxt router and switch to "IP" and "Service"

21. Lalu pilih winbox dan klik 2x
21. Then select winbox and click 2x
22. Dan isikan IP pada kolom “available from” Ip itu adalah hanya IP yang dimasukan yang dapat login ke router. Setelah itu “Apply” dan “OK”
22. And IP fill in the "available from" Ip it is the only IP is entered to log into the router. After the "Apply" and "OK"

23. Jika sudah akan terlihat
23. If it is to be seen
24. Pada client ubah IP nya menjasi IP yang telah didaftarkan untuk login dan mengakses router
24. On the client to change its IP IP womanly who have registered to login and access the router
25. Coba lakukan login kembali setelah mengganti IP yang telah didaftarkan
25. Try to do log back in after replacing the IP that has been registered

26. Coba kembali ubah IP pada client dengan ip yang beda dengan yang telah didaftarkan
26. Try again to change the IP on the client with different ip that has been registered


3. Setelah itu akan muncul tampilan seperti berikut , isikan “Identify” sesuai dengan nama yang anda inginkan , lalu “Apply” dan “OK”
3. After that will appear as follows, fill in the "Identify" to the name that you want, and then "Apply" and "OK"
4. Jika sudah selesai maka hubungkan kembali mikrotik pada winboxt, jika berhasil akan terlihat pada bagian paling atas nama yang telah diubah
4. If you are finished then reconnect mikrotik on winboxt, if successful will be visible on the top of the names have been changed
Manajemen User
5. Disini akan membuat user baru dalam kelompok grup full. Pilih “system” lalu “Users”
5. Here will create a new user group full group. Select "System" then "Users"
6. Pilih tanda “+” untuk menambahkan user. disini menggunakan Group “Full” maksud dari full adalah user baru memegang seluruh hak atas router . Dan klik “Apply” lalu “OK”
6. Select the "+" to add a user. here using Group "Full" the intent of the new user full holds the rights to the router. And click "Apply" then "OK"
8. Dan selanjutnya buat user admin dengan menambahkan Ip, setelah itu “Apply” dan “OK”
8. And then create an admin user to add Ip, after the "Apply" and "OK
9. Dan jika sudah akan terlihat user yang telah dibuat
9. And if it is going to be visible to users who have been made
Dan coba login dengan user yang telah dibuat sebelumnya yaitu contoh “Titin”
And try to login with the user that was created earlier is an example of "Titin"
10. Dan terlihat pada bagian atas dan nama paling depan telah terganti menjadi user yang baru dibuat
10. And look at the top and the name of the front has been replaced into the newly created user
11. Lalu pada client ubah ip selain dari ip router dan admin
11. Then the client to change ip ip router and apart from admin
12. Kemudian login menggunakan user yang buat dengan menggunakan IP
12. Then login using the user that created by using IP
13. Lalu tidak akan bisa login dna hanya muncul peringatan terjadi kesalahan username atau password, hal ini karena IP admin untuk client yang telah diatur beda dengan IP client
13. Then will not be able to login dna warning appears only username or password error occurs, it is because the IP admin to client who has arranged different IP client
Manajement Service
14. Selanjutnya kita login dengan user yang berhasil
14. Next we login with the user successfully
15. Dan pergi ke “IP” lalu “Service” karena disini akan mengubah port pada telnet menjadi 8080 dan login melalui telnet
15. And go to the "IP" and "Service" because here will change the telnet port on into 8080 and login through telnet
16. Kemudian double klik pada bagian telnet dan ubah port , dan “Apply” lalu “OK”
16. Then double-click on the telnet and change the port, and "Apply" and "OK"
17. Dan ini tampilan jika port telnet telah berhasil dirubah
17. And this is the view if the telnet port has successfully revamped
18. Untuk melakukan pengujian telnet dengan port yang telah diubah , gunakan putty untuk meremot nya. Isikan IP address router, pada bagian port isi kan port yang telah diubah, dan jenis koneksi “Telnet” lalu “open”
18. To perform the test with the telnet port has been changed, use putty to its Meremoth. Fill in the IP address of the router, on the part of the contents of the port the port has been changed, and the connection type "Telnet" and "open"
19. Lalu akan diminta user dan password
19. Then the user will be asked and password
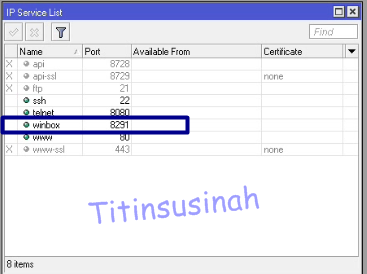
20. Lalu hubungkan kembali router dengan winboxt dan beralih ke “IP” lalu “Service”
20. Then reconnect with winboxt router and switch to "IP" and "Service"
21. Lalu pilih winbox dan klik 2x
21. Then select winbox and click 2x
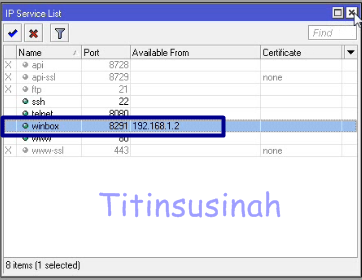
22. Dan isikan IP pada kolom “available from” Ip itu adalah hanya IP yang dimasukan yang dapat login ke router. Setelah itu “Apply” dan “OK”
22. And IP fill in the "available from" Ip it is the only IP is entered to log into the router. After the "Apply" and "OK"
23. Jika sudah akan terlihat
23. If it is to be seen
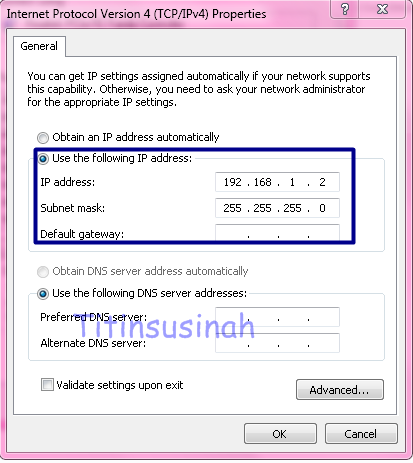
24. Pada client ubah IP nya menjasi IP yang telah didaftarkan untuk login dan mengakses router
24. On the client to change its IP IP womanly who have registered to login and access the router
25. Coba lakukan login kembali setelah mengganti IP yang telah didaftarkan
25. Try to do log back in after replacing the IP that has been registered
26. Coba kembali ubah IP pada client dengan ip yang beda dengan yang telah didaftarkan
26. Try again to change the IP on the client with different ip that has been registered

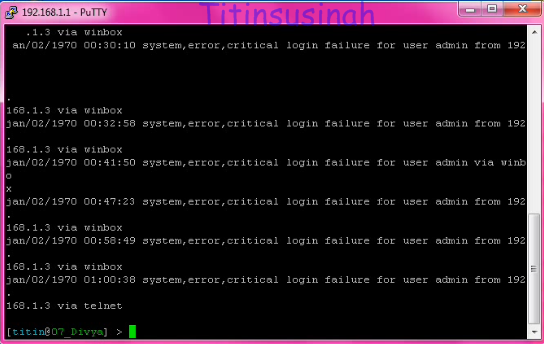
27. Lalu tidak akan bisa login dan muncul peringatan seperti berikut , karena telah mengubah ip yang berbeda dengan yang didaftarkan
27. Then will not be able to login and warnings appear as follows, for changing ip is different from the registered
Selesai, terimaksih
Finish, thankyou
Do you like this article? Share It!


0 komentar to "Lab 7. Manajemen User and Service"
Daily


Posting Komentar